How to Make an Ice Fishing Tip Up

Geoff Stadnyk in Ice Fishing on
Building an ice fishing tip up is a lot simpler than it looks. Here are two simple tip up traps that you can DIY with minimal tools and supplies.
Note that the effectiveness of these tip ups depends a lot on what’s underneath you. We recommend using a fish finder for ice fishing so that you maximize your catch.
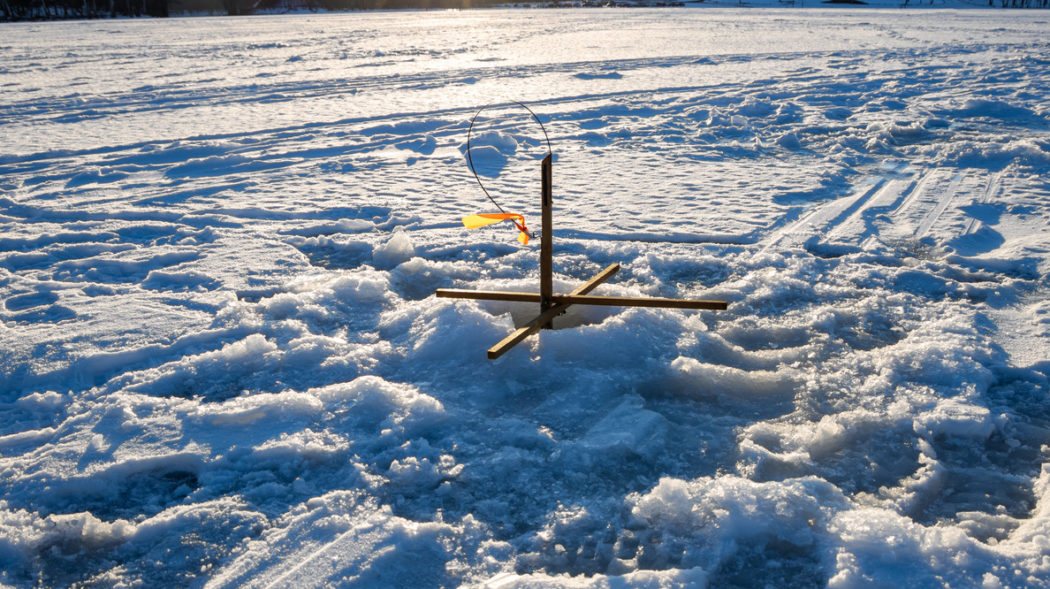
How To Make A Cross Style Tip Up
This primitive version of the cross style tip up is the most basic model trap you can build. They’re so simple your kids could make them for you!
Tools:
- A small hand saw or hatchet
- A knife or fishing knife and/or heavy-duty scissors
- A lighter or flame source (if using paracord or nylon rope)
Materials:
- One good thick stick (about 1” – 2” in diameter)
- A second, thinner stick (½” – 1” in diameter)
- Paracord, rope, or twine – 10’ – 15’
- A flag, preferably of a bright color
Directions:
Step 1: Cut two sticks for your cross poles – one slightly thinner than the other. Both need to be as long as twice the diameter of your fishing hole.
The thinner stick is for your flag and line. It shouldn’t be too thin or brittle, or the fish may break it.
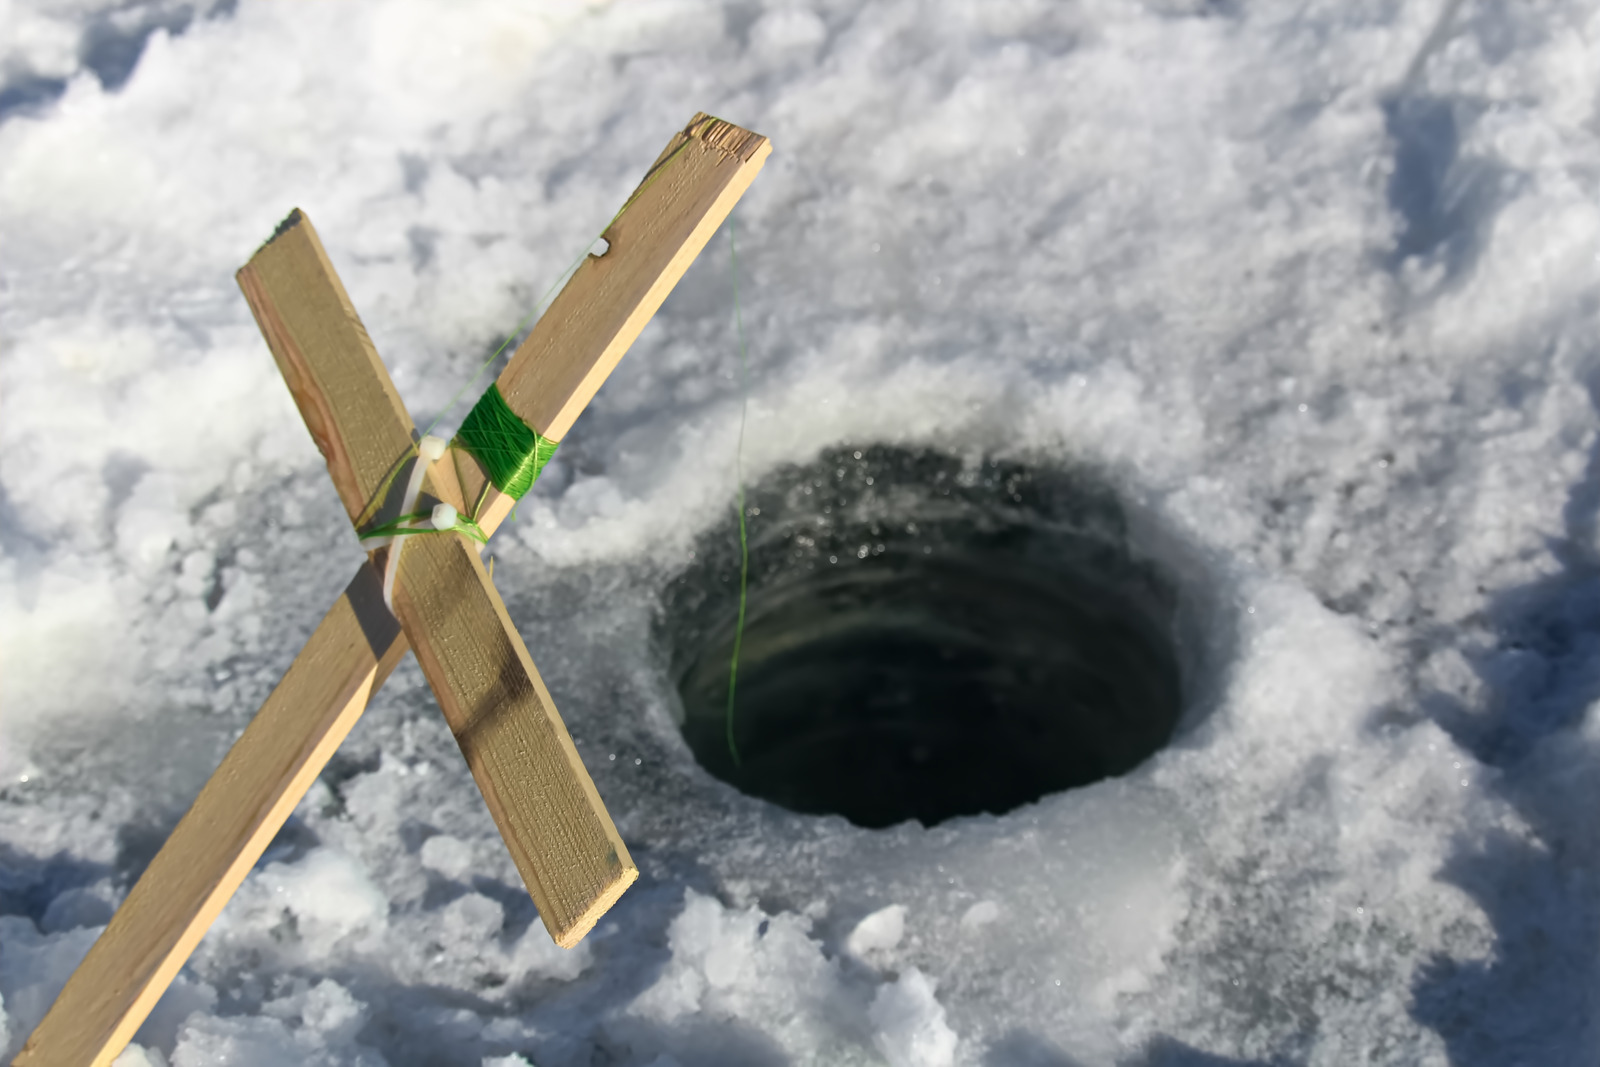
Step 2: Lay the thinner pole across the midpoint of the thicker one (your base). Make sure to leave a few inches of space above the base pole to tie your line. Secure your poles tight together with either a square or diagonal lashing.
- TIP: If you’re using a paracord or nylon string, use a lighter to melt the cut ends of the rope before lashing to prevent fraying.
- TIP: Avoid using an elastic rope or string, as these materials tend to stretch with use.
Step 3: Attach a line with your bait rig to the short end of the thinner stick.
Step 4: Tie a noticeable flag to the long end of the thin stick. You are now ready to fish!
To Set:
Lay the base pole over your fishing hole with the flag lying on the ice. When a fish pulls on the line, the base pole rotates, and the flag flips up. That’s all there is to it!
How To Make A Rail Style Tip Up
This trap design uses an ingenious trigger – an ordinary wooden mousetrap. You can customize this build to include a fishing rod and/or reel.
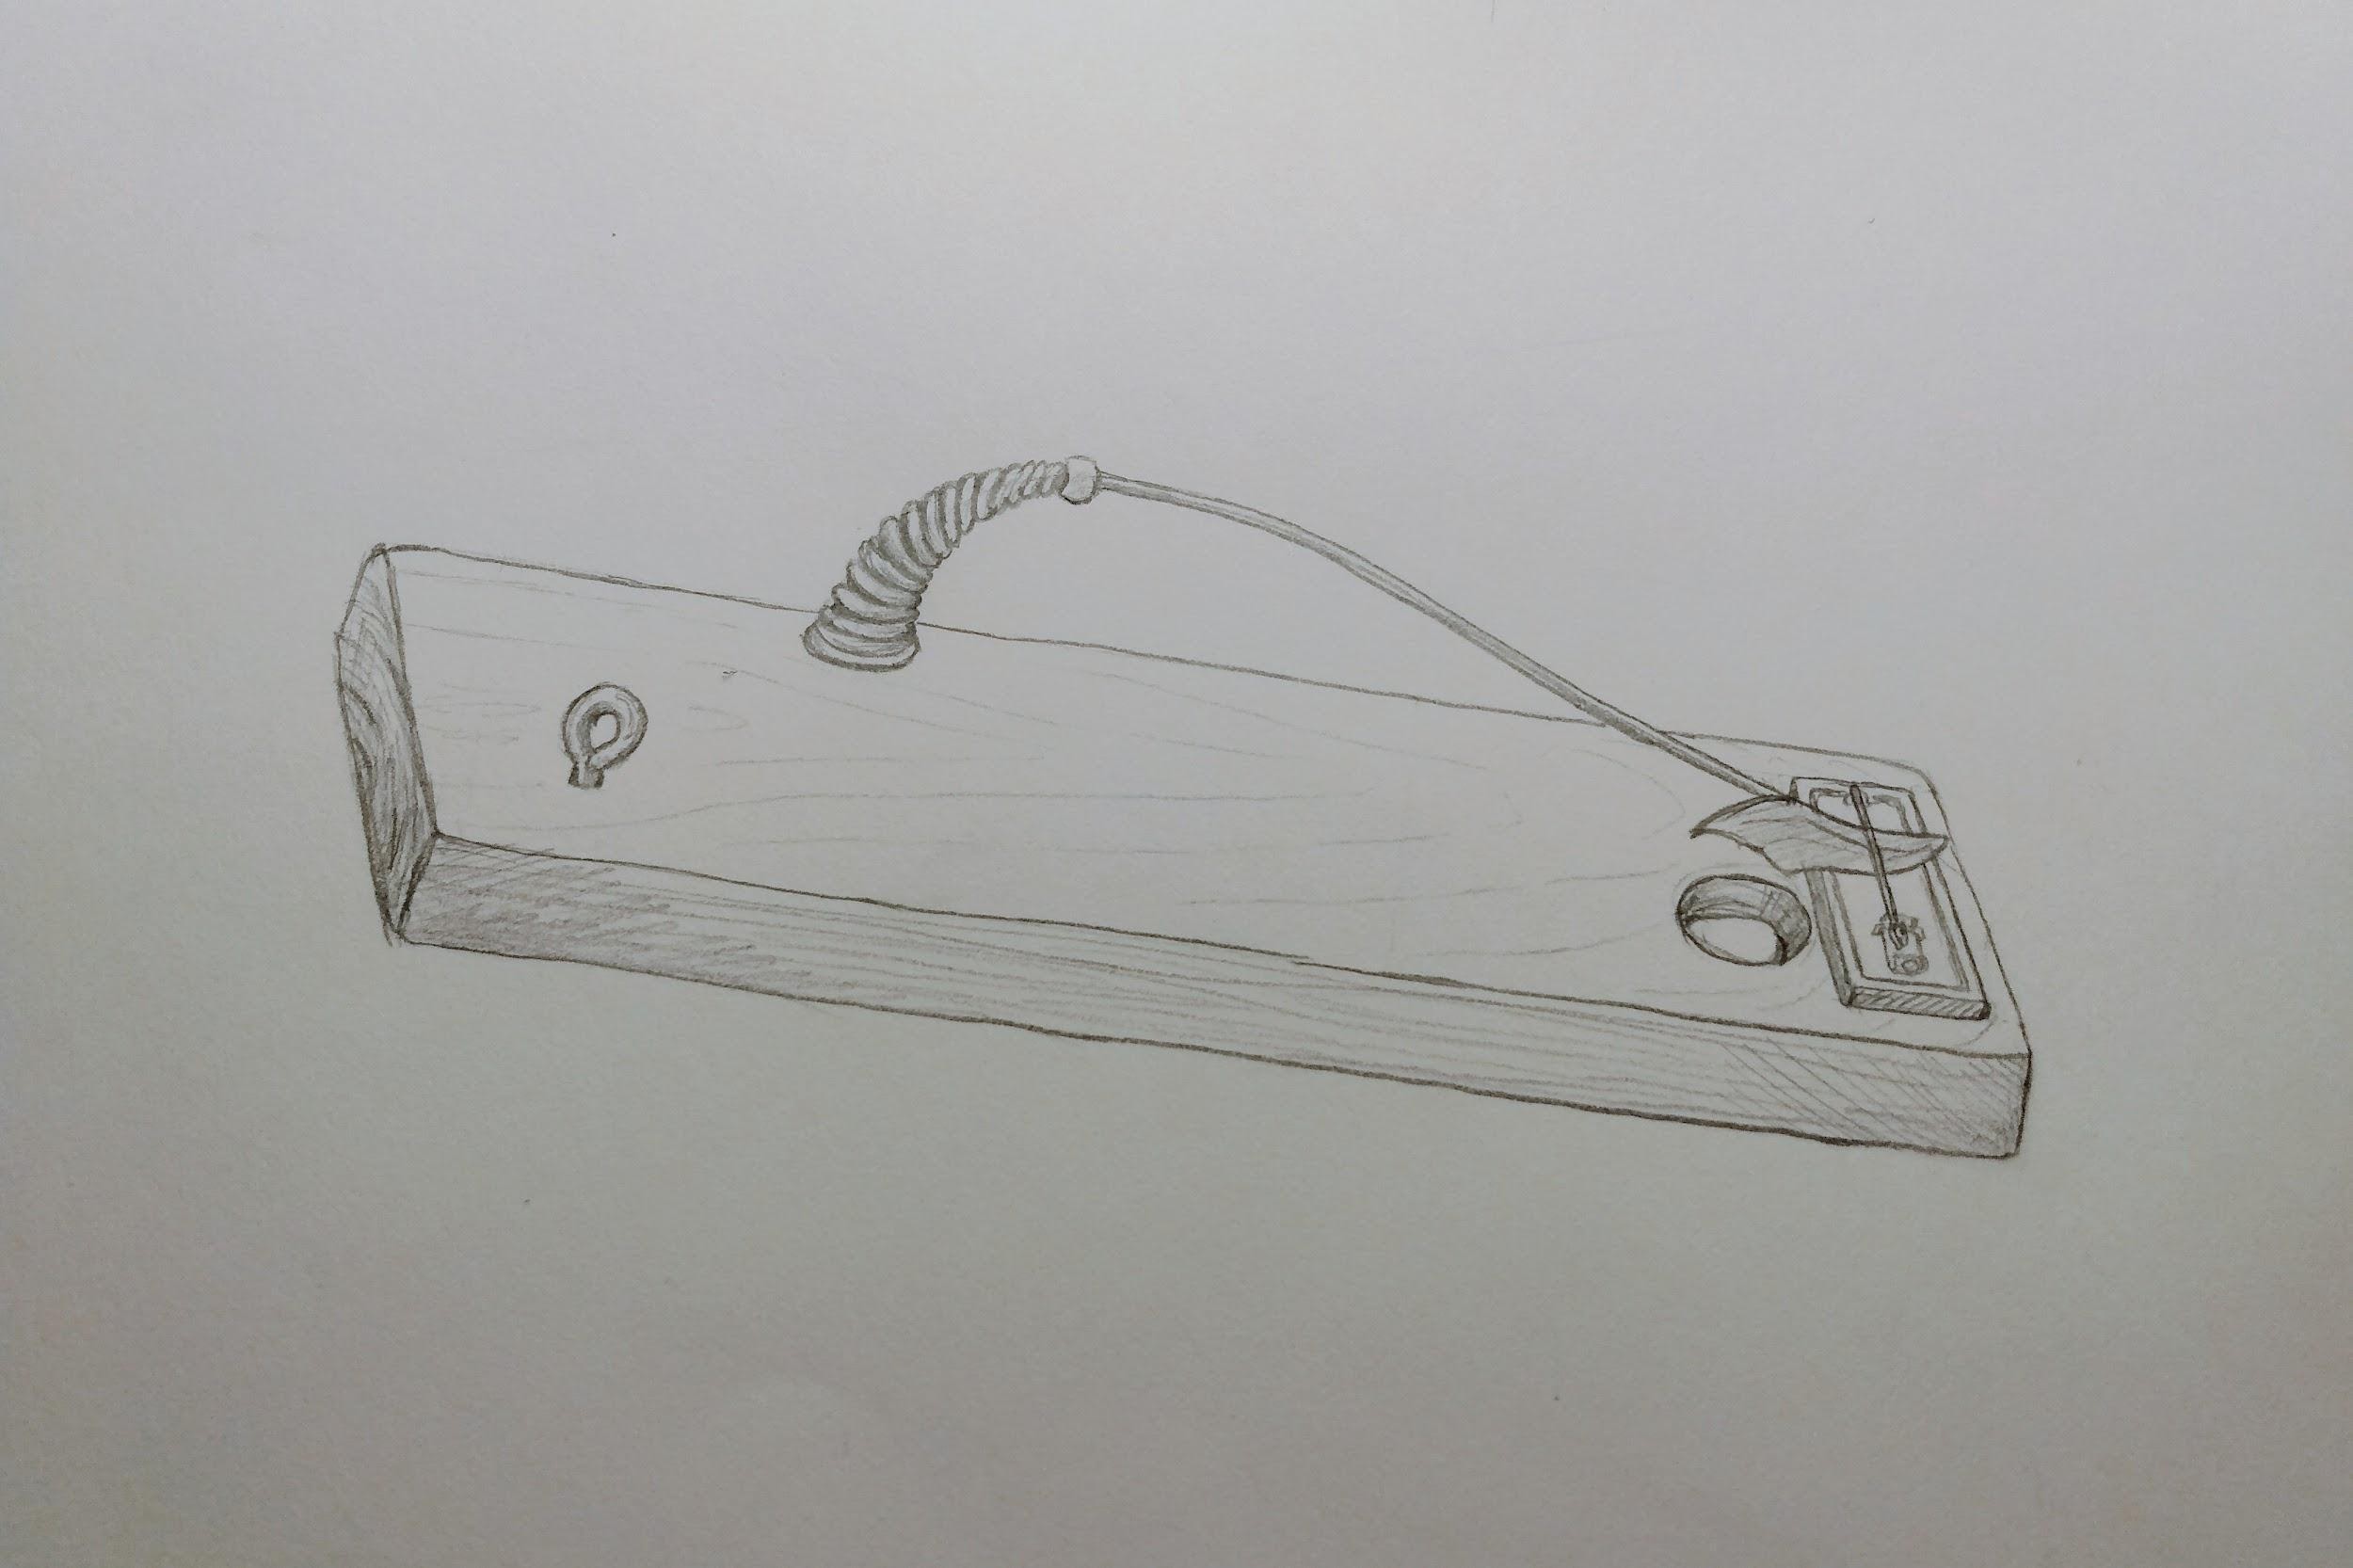
Sketch of the “mousetrap” rail tip up w/out the line attached.
Tools:
A saw
A Phillips-head screwdriver
An electric drill
1½” hole saw or spade drill bit
⅛” drill bit
A pair of needle nose pliers
A small piece of 60 or 80-grit sandpaper
A pencil
Materials:
A sturdy board – 1½” x 4½” x 24”
A spring door stop kit
One 1½”- 2” stainless steel screw eye hook
One ¾” wood screw
A wooden mousetrap
A landscaping flag
Directions:
Step 1: Cut the baseboard.
Step 2: Align the mousetrap ¼”- ½” from one end of the board. Face the open side of the trigger plate towards the center of the board. Trace around the corners.
Step 3: Mark where the center of your hole will be. This should be between the trigger plate and the spring. Center your spade bit or hole saw where you want to drill.
- TIP: You want the edge of your hole no farther than ¼” from the edge of the mousetrap.
Step 4: Drill out your hole. If using a hole saw, drill a pilot hole through the board with your ⅛” drill bit. Drill halfway through one side with the hole saw, then flip the board over and drill the rest.
Step 5: Remove the kill bar on the mousetrap by pulling out its U-nails with pliers.
Step 6: Re-align the mousetrap with the marks you made earlier. Fasten it to the baseboard with the ¾” screw.
Step 7: Install the eye hook on the opposite side of your board. Line it up to the center of your hole.
Step 8: Push the metal end of your flag into the center of the plastic cover of the door stop. Slide it to the bottom of the spring.
- TIP: Don’t glue your flag to the spring. This lets you adjust its length.
Step 9: Place the end cap on the bottom of the spring loosely. Determine where to secure your flag.
When set, the flag end should slip under the trigger bar of the mousetrap and provide tension. Draw a circle around where you want your spring.
- TIP: Try to place it as near to the side of the baseboard as possible. This prevents the flag from accidentally interfering with the line.
Step 10: Using the screw from the kit, fasten the spring base to the board. Attach the spring.
Step 11: Sand down all sharp and rough edges around both sides of the hole and inside. This prevents the wood from stressing your line.
To Set:
- Tie your line to the eye hook.
- Drop the hook end through the hole.
- Bring the line back up and loop it 2 or 3 times around the trigger bar, just behind the bend. Be sure to leave some slack between the eye hook and trigger.
- Set the bar into the trigger plate. While holding that in place, tuck the end of your flag under the bar.
Viola! Your trap is set. Have some fun and test it out a few times to get the hang of it!
In Summary
The primitive cross style tip up and the simplified rail tip up featured above are the two cheapest and easiest ice fishing traps you can build. They each take less than half an hour to make.
The cross style comes in handy for a survival situation, while the rail style uses a mousetrap as an easy and effective trigger mechanism. Tailor both to suit your style.
These tip up traps are so effective you might want to make sure you do multiple. Otherwise be sure to bring a chair and a heater otherwise you might get cold waiting around for your tip up to hit!
You don’t have to wait until your next fishing trip out on the ice. Grab a pencil right now and give these designs a try!
Geoff started fishing as a child in the gorgeous lakes of Mammoth, while on family vacations. His fishing experience includes the use of fly rod and reel. Guided trips along the Madison and Gallatin rivers in Montana, the Frying Pan and Animus in Colorado, and the Deschutes river in Oregon have all paid off and helped make Geoff the angler and writer that he is today.
As an Amazon Associate, Fishermen's Angle earns from qualifying purchases. We get commissions for purchases made through links in this post.